“Work. ”
前言
安装前可以浏览这三个教程:
wsl安装教程
安装wsl后虚拟机无法启动
原生ubuntu安装教程
Ubuntu
1、安装系统
步骤1 - 启用适用于 Linux 的 Windows 子系统:
需要先启用“适用于 Linux 的 Windows 子系统”可选功能,然后才能在 Windows 上安装 Linux 分发。
以管理员身份打开 PowerShell 并运行:
1
|
dism.exe /online /enable-feature /featurename:Microsoft-Windows-Subsystem-Linux /all /norestart
|
步骤2 - 启用虚拟机功能:
安装 WSL 2 之前,必须启用“虚拟机平台”可选功能。 计算机需要虚拟化功能才能使用此功能。
以管理员身份打开 PowerShell 并运行:
1
|
dism.exe /online /enable-feature /featurename:VirtualMachinePlatform /all /norestart
|
步骤3 - 下载 Linux 内核更新包:
以管理员身份打开 PowerShell 并运行:
步骤4 - 将 WSL 2 设置为默认版本:
打开 PowerShell,然后在安装新的 Linux 发行版时运行以下命令,将 WSL 2 设置为默认版本:
1
|
wsl --set-default-version 2
|
步骤5 - 安装所选的 Linux 分发版:
• Ubuntu 16.04 LTS
• Ubuntu 18.04 LTS
• Ubuntu 20.04 LTS
• openSUSE Leap 15.1
• SUSE Linux Enterprise Server 12 SP5
• SUSE Linux Enterprise Server 15 SP1
• Kali Linux
• Debian GNU/Linux
• Fedora Remix for WSL
• Pengwin
• Pengwin Enterprise
• Alpine WSL
2、修改环境
切换镜像
修改源:找到 cd /etc/apt 路径下的 sources.list 文件对其进行修改
在此路径下打开命令行,输入sudo vim sources.list
命令行中相关操作命令如下:
• g 光标到头部
• d 删除
• shift + g 全部删除
• i 写入
• 粘贴 以下 阿里源 或 清华源
• ESC 退出写入模式
• :wq 保存退出
复制镜像源
 1
 2
 3
 4
 5
 6
 7
 8
 9
10
11
12
13
14
15
16
17
18
19
20
21
22
23
24
25
26
|
deb http://mirrors.aliyun.com/ubuntu/ xenial main restricted universe multiverse
deb http://mirrors.aliyun.com/ubuntu/ xenial-security main restricted universe multiverse
deb http://mirrors.aliyun.com/ubuntu/ xenial-updates main restricted universe multiverse
deb http://mirrors.aliyun.com/ubuntu/ xenial-backports main restricted universe multiverse
##测试版源
deb http://mirrors.aliyun.com/ubuntu/ xenial-proposed main restricted universe multiverse
# 源码
deb-src http://mirrors.aliyun.com/ubuntu/ xenial main restricted universe multiverse
deb-src http://mirrors.aliyun.com/ubuntu/ xenial-security main restricted universe multiverse
deb-src http://mirrors.aliyun.com/ubuntu/ xenial-updates main restricted universe multiverse
deb-src http://mirrors.aliyun.com/ubuntu/ xenial-backports main restricted universe multiverse
##测试版源
deb-src http://mirrors.aliyun.com/ubuntu/ xenial-proposed main restricted universe multiverse
# Canonical 合作伙伴和附加
deb http://archive.canonical.com/ubuntu/ xenial partner
deb http://extras.ubuntu.com/ubuntu/ xenial main
deb https://mirrors.tuna.tsinghua.edu.cn/ubuntu/ bionic main restricted universe multiverse
deb https://mirrors.tuna.tsinghua.edu.cn/ubuntu/ bionic-updates main restricted universe multiverse
deb https://mirrors.tuna.tsinghua.edu.cn/ubuntu/ bionic-backports main restricted universe multiverse
deb https://mirrors.tuna.tsinghua.edu.cn/ubuntu/ bionic-security main restricted universe multiverse
deb https://mirrors.tuna.tsinghua.edu.cn/ubuntu/ bionic-proposed main restricted universe multiverse
deb-src https://mirrors.tuna.tsinghua.edu.cn/ubuntu/ bionic main restricted universe multiverse
deb-src https://mirrors.tuna.tsinghua.edu.cn/ubuntu/ bionic-updates main restricted universe multiverse
deb-src https://mirrors.tuna.tsinghua.edu.cn/ubuntu/ bionic-backports main restricted universe multiverse
deb-src https://mirrors.tuna.tsinghua.edu.cn/ubuntu/ bionic-security main restricted universe multiverse
deb-src https://mirrors.tuna.tsinghua.edu.cn/ubuntu/ bionic-proposed main restricted universe multiverse
|
更新镜像
操作完成后使用如下命令更新镜像:
• sudo apt-get update 更新
• sudo apt-get upgrade 更新
sudo add-apt-repository ppa:openjdk-r/ppa
安装jdk:sudo apt-get install openjdk-8-jdk
拓展篇(在环境Ubuntu/Mint物理机上安装python环境):
1
|
update-alternatives --list python
|
1
|
sudo update-alternatives --install /usr/bin/python python /usr/bin/python3.6 1
|
1
|
sudo update-alternatives --install /usr/bin/python python /usr/bin/python2.7 2
|
1
|
sudo update-alternatives --config python
|
1
|
sudo apt install python3-pip
|
3、 纠错
错误1:证明器不存在

检查dist文件夹下有没有这个cprover_priority
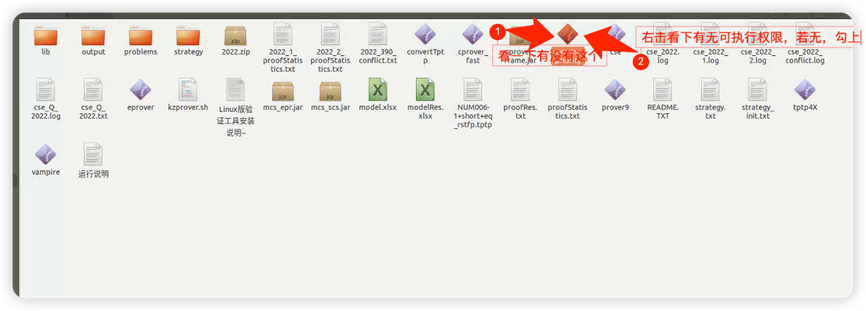
若没有那就把cse 改成这个名字,然后再添加可执行权限

错误2:判定异常
若验证检查结果异常,需记录判定情况,需要记录的有:
策略:多策略模式下为桌面的strategy文件夹;单策略模式下为strategy.txt文件
判定过程文件夹:桌面output文件夹下与判定例子同名的文件夹。
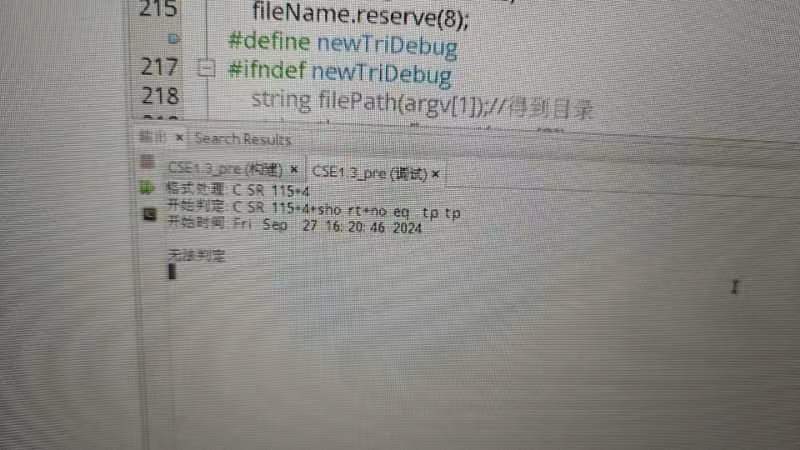
在代码操作中,指针越界
错误3:格式转换失败
可能的原因:
1、没有放置公理集Axioms
2、没有使用Eprover融合系统,没有使用到转换的文件
3、由于问题的原因,可能无法转换
4、可能转换成功,但是界面显示错误
错误4:调试失败(一般少见)
问题:
同样的例子在调试过程中超时导致无法判定
但是在带界面版本能得到不可满足
在别的电脑上调试也能成功
解决方法:
重装ubuntu系统